0%

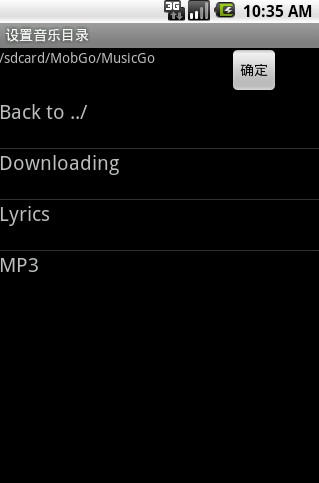
有两个Activity,A,B,由A启动B,并传数据给B,B在经过处理后把数据传回给A。举个例子,A是主程序,B是设置参数的Activity,在B修改设置后,要让A重新读取设置,就要用到回传数据.主要是两个函数startActivityForResult onActivityResult 先是A传B:

        Bundle bd = new Bundle();
             bd.putString("Dir", "/sdcard/");
        Intent intent=new Intent();
        intent.putExtras(bd);
          intent.setClass(main.this,location.class);
        startActivityForResult(intent,2);
            //这里的2是我随便写的,代表requestCode,就是用来做个标记,网上的例子好像都是写requestCode,
        //结果我在测试时A没接收到,这里必须填正数

然后就是B接收再传回:

Intent it = new Intent(); 
it.putExtra("Dir",(String) tv1.getText());
setResult(2, it);//2与前面的A里的2对应
finish();

A里的接收代码:

    protected void onActivityResult(int requestCode, int resultCode, Intent data) {
        //B返回时触发
     }
这里的菜单指的是,按手机menu按钮时出现在屏幕底部的菜单。Menu不需要在xml中定义,直接在程序中插入即可。

  protected static final int MENU_Set=Menu.FIRST;
    protected static final int MENU_about=Menu.FIRST+1;
    
    public boolean onCreateOptionsMenu(Menu menu){
        super.onCreateOptionsMenu(menu);
        menu.add(0,MENU_Set,0,"设置目录");
        menu.add(0,MENU_about,0,"关于");
    //组id,选项id(直接用数字就可以,不要重复,这样就不需要定义MENU_Set和MENU_about),排序(小在前),选项名
    return super.onCreateOptionsMenu(menu);
        
    };
    public boolean onOptionsItemSelected(MenuItem Item){
        super.onOptionsItemSelected(Item);
        switch(Item.getItemId()){
        case MENU_Set:
            jump(dir);
            //点击设置时执行
            break;
        case MENU_about:
            openOptionsDialog();
            //点击关于时执行;
            break;
        }
        return super.onOptionsItemSelected(Item);
        
    }

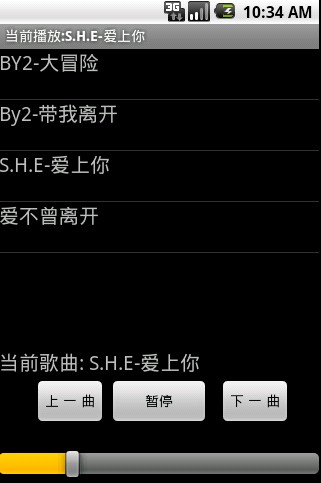
学Android也有一段时间了,前几天基本都是照着教程打下例子,今天花了一天的时间动手写了一个音乐播放器。期间查了很多资料,因为明天要上班了,赶时间,所以没抄上笔记,有时间再把源码放上来大家学习。看看效果图吧。 在读取歌名方面,因为读取ID3比较复杂,没搞明白还,现在只是读取文件名,再除掉扩展名。功能基本完善了,可以设置音乐目录,避免像自带音乐播放器一样读取卡上的一些游戏音乐之类的文件。本想加上甩歌功能,但是运行网上的重力感应Demo老是出错,暂时无法实现,以后再改吧。
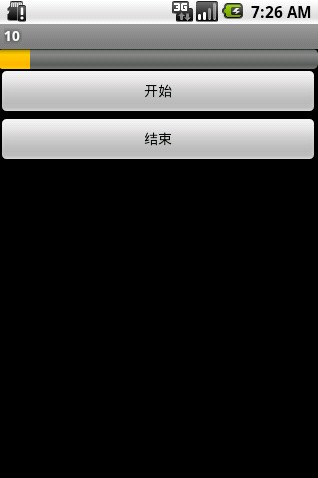
当我们在处理下载或是其他需要长时间执行的任务时,如果直接把处理函数放Activity的OnCreate或是OnStart中,会导致执行过程中整个Activity无响应,如果时间过长,程序还会挂掉。Handler就是把这些功能放到一个单独的线程里执行,与Activity互不影响。今天的例子就结合前几天学的进度条ProgressBar,用Handler更新ProgressBar. 先看最终效果图吧: 当按开始按钮时,进度条会每隔500毫秒加1,直到加到100或者按停止时停止 xml:

package com.pocketdigi;

import android.app.Activity;
import android.os.Bundle;
import android.os.Handler;
import android.view.View;
import android.view.View.OnClickListener;
import android.widget.Button;
import android.widget.ProgressBar;

public class main extends Activity {
    /** Called when the activity is first created. */
    ProgressBar pb1;
    Handler handle=new Handler();
    //新建一个Handler对象
    Button b1;
    Button b2;
    @Override
    public void onCreate(Bundle savedInstanceState) {
        super.onCreate(savedInstanceState);
        setContentView(R.layout.main);
        pb1=(ProgressBar)findViewById(R.id.pb1);
        pb1.setProgress(0);
        b1=(Button)findViewById(R.id.b1);
        b1.setOnClickListener(b1Lis);
        b2=(Button)findViewById(R.id.b2);
        b2.setOnClickListener(b2Lis);
        
    }
    private OnClickListener b1Lis=new OnClickListener(){

        @Override
        public void onClick(View v) {
            // TODO Auto-generated method stub
            handle.post(add);
            //开始执行add
        }
        
    };
    private OnClickListener b2Lis=new OnClickListener(){

        @Override
        public void onClick(View v) {
            // TODO Auto-generated method stub
            handle.removeCallbacks(add);
            //停止执行
            pb1.setProgress(0);
        }
        
    };
    int pro=0;
    Runnable add=new Runnable(){
        //定义add
        @Override
        public void run() {
            // TODO Auto-generated method stub
            pro=pb1.getProgress()+1;
            pb1.setProgress(pro);
            setTitle(String.valueOf(pro));
            if(pro<100){
            handle.postDelayed(add,500);
            //如果进度小于100,,则延迟500毫秒后重复执行add
            }
            
        }
        
    };

}

图片按钮ImageButton可以把一张图片设为一个按钮,代替Button组件功能,以增加程序美感。 如上图,点击图片按钮后触发OnClickListener事件,在标题栏显示文字 xml:

<?xml version="1.0" encoding="utf-8"?>
<LinearLayout xmlns:android="http://schemas.android.com/apk/res/android"
    android:orientation="vertical"
    android:layout_width="fill_parent"
    android:layout_height="fill_parent"
    >
<ImageButton android:id="@+id/ib"
    android:src="@drawable/bookmark_001"
    android:layout_width="wrap_content"
    android:layout_height="wrap_content"
/>
</LinearLayout>

程序代码:

package com.pocketdigi;

import android.app.Activity;
import android.os.Bundle;
import android.view.View;
import android.view.View.OnClickListener;
import android.widget.ImageButton;

public class main extends Activity {
    /** Called when the activity is first created. */
    ImageButton ib;
    @Override
    public void onCreate(Bundle savedInstanceState) {
        super.onCreate(savedInstanceState);
        setContentView(R.layout.main);
        ib=(ImageButton)findViewById(R.id.ib);
        ib.setOnClickListener(ibLis);
        
    }
    private OnClickListener ibLis=new OnClickListener(){

        @Override
        public void onClick(View v) {
            // TODO Auto-generated method stub
            setTitle("图片按钮被点了");
            
        }
        
    };
}

ImageView控件用于显示图片,功能简单,用法也简单,先看本例最终效果图: 跟前几个控件相比,ImageView控件在使用上要多一个步骤,就是添加图片文件。 第一步,把图片文件拖进res/drawble目录中(hdpi、ldpi、mdpi貌似都没关系),注意文件名,如果图片文件名是中文的或是数字,会出错。 然后就是布局xml:

<ImageView android:id="@+id/iv"
    android:src="@drawable/t2"
    android:layout_width="wrap_content"
    android:layout_height="fill_parent"
/>

这里的t2就是图片文件名对应,不需要加扩展名,因为这里的t2其实不是文件名,只是R.java里的一个索引 程序里就不需要写了,这样可以直接显示。

如果大家去market下软件,在下载完的软件那,每个软件都会有5个五角星让你评分,其实这个就是RatingBar,RatingBar可以方便的让用户帮助你打分。 下面是效果图: 界面上就一个TextView,一个RatingBar,当用户执行评分操作时,TextView上会显示当前用户评分。 下面我们来实现。先是布局xml:
<?xml version="1.0" encoding="utf-8"?>
<LinearLayout xmlns:android="http://schemas.android.com/apk/res/android"
    android:orientation="vertical"
    android:layout_width="fill_parent"
    android:layout_height="fill_parent"
    >
<TextView  android:id="@+id/tv"
    android:layout_width="fill_parent" 
    android:layout_height="wrap_content" 
    android:text=""
    />
<RatingBar android:id="@+id/rb"
    android:layout_width="wrap_content"
    android:layout_height="fill_parent"
    android:numStars="3"
    android:rating="1"
/>
<!--这里要注意了,layout_width必须是wrap_content,如果设成fill_parent,
不管你在后面把满分设为几颗星,它都会把屏幕横向显示满为止-->
</LinearLayout>

其中,以下两句第一句是用来定义总分,第二句是默认评分,其实这两句在这个程序中没用的,因为等会我们在程序代码中要重定义,这里写上只不过是演示用法。

android:numStars="3"
android:rating="1"

下面是程序代码:

package com.pocketdigi;

import android.app.Activity;
import android.os.Bundle;
import android.widget.RatingBar;
import android.widget.TextView;
import android.widget.RatingBar.OnRatingBarChangeListener;

public class main extends Activity {
    /** Called when the activity is first created. */
    RatingBar rb;
    TextView tv;
    @Override
    public void onCreate(Bundle savedInstanceState) {
        super.onCreate(savedInstanceState);
        setContentView(R.layout.main);
        tv=(TextView)findViewById(R.id.tv);
        rb=(RatingBar)findViewById(R.id.rb);
        rb.setNumStars(5);
        rb.setRating(3);   
        rb.setOnRatingBarChangeListener(rbLis);
        //定义一个监听器
    }
    private OnRatingBarChangeListener rbLis=new OnRatingBarChangeListener(){

        @Override
        public void onRatingChanged(RatingBar ratingBar, float rating,
                boolean fromUser) {
            tv.setText(String.valueOf(rb.getRating()));
            //输出评分
        }
        
    };
}

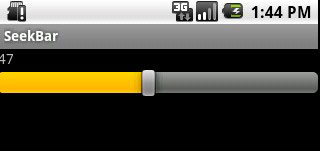
SeekBar类似于ProgressBar,不过ProgressBar主要功能是让用户知道目前的状态,而SeekBar的功能在于让用户调整进度。举个例子,在音乐播放器中,你可以通过SeekBar来调整音乐播放的进度。 下面是效果图: 拖动时,TextView会动态显示当前的进度 布局xml代码:

<?xml version="1.0" encoding="utf-8"?>
<LinearLayout xmlns:android="http://schemas.android.com/apk/res/android"
    android:orientation="vertical"
    android:layout_width="fill_parent"
    android:layout_height="fill_parent"
    >
 <TextView android:id="@+id/tv"
     android:layout_width="fill_parent"
     android:layout_height="wrap_content"
     android:text=""
 />
 <SeekBar 
        android:id="@+id/seek"
        android:layout_width="fill_parent"
        android:layout_height="wrap_content"
        android:max="100" 
        android:progress="10"
 />
</LinearLayout>

程序代码:

package com.pocketdigi;

import android.app.Activity;
import android.os.Bundle;
import android.widget.SeekBar;
import android.widget.TextView;
import android.widget.SeekBar.OnSeekBarChangeListener;

public class main extends Activity {
    /** Called when the activity is first created. */
    SeekBar sb;
    TextView tv;
    @Override
    public void onCreate(Bundle savedInstanceState) {
        super.onCreate(savedInstanceState);
        setContentView(R.layout.main);
        tv=(TextView)findViewById(R.id.tv);
        sb=(SeekBar)findViewById(R.id.seek);
        sb.setProgress(90);
        sb.setOnSeekBarChangeListener(sbLis);
    }
    private OnSeekBarChangeListener sbLis=new OnSeekBarChangeListener(){

        @Override
        public void onProgressChanged(SeekBar seekBar, int progress,
                boolean fromUser) {
            //进度改变时触发
            tv.setText(String.valueOf(sb.getProgress()));
            
        }

        @Override
        public void onStartTrackingTouch(SeekBar seekBar) {
            // 开始拖动时触发,与onProgressChanged区别在于onStartTrackingTouch在停止拖动前只触发一次
            //而onProgressChanged只要在拖动,就会重复触发
        }

        @Override
        public void onStopTrackingTouch(SeekBar seekBar) {
            //结束拖动时触发
            
        }
        
    };
}

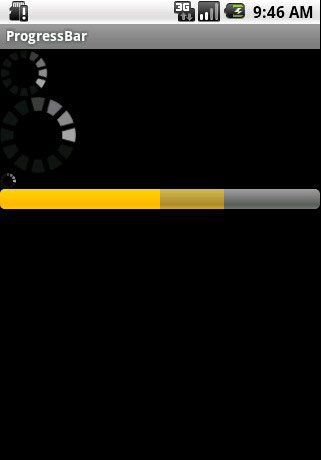
进度条可以方便地告诉用法现在执行任务的进度,特别是一个程序需要执行比较长一段时间时,如果没有进度条,用户不知道程序在执行,会以为程序假死而强制关闭程序。 效果图 从上往下,第一个是默认的进度条,第二是大点的,第三是小点的,第四是条状的,关键区别在于xml中的style. main.xml:

<ProgressBar
      android:layout_width="wrap_content"
      android:layout_height="wrap_content"
      />
<ProgressBar 
      android:layout_width="wrap_content"
      android:layout_height="wrap_content"
      style="?android:attr/progressBarStyleLarge"
      />
 <ProgressBar 
      android:layout_width="wrap_content"
      android:layout_height="wrap_content"
      style="?android:attr/progressBarStyleSmall"
      />
<ProgressBar android:id="@+id/pb1"
      android:layout_width="fill_parent"
      android:layout_height="wrap_content"
      style="?android:attr/progressBarStyleHorizontal"
      android:max="100"<!--最大进度值为100-->
      android:progress="10"  <!--默认进度值为10-->
      android:secondaryProgress="70" <!--第二进度值为70,就是颜色淡点的那个-->
      />

程序代码:

package com.pocketdigi;

import android.app.Activity;
import android.os.Bundle;
import android.widget.ProgressBar;

public class main extends Activity {
    /** Called when the activity is first created. */
    ProgressBar pb1;
    @Override
    public void onCreate(Bundle savedInstanceState) {
        super.onCreate(savedInstanceState);
        setContentView(R.layout.main);
        pb1=(ProgressBar)findViewById(R.id.pb1);
        pb1.setProgress(50);
    }

}

pb1.incrementProgressBy(5); pb1进度值增加5 pb1.incrementProgressBy(-5); pb1进度值减少5 pb1.incrementSecondaryProgressBy(5); pb1背后的第二个进度条 进度值增加5 pb1.incrementSecondaryProgressBy(-5); pb1背后的第二个进度条 进度值减少5

模拟时钟AnalogClock和数字时钟DigitalClock,用法功能很简单,就是显示一个模拟时钟或是数字时钟,效果图: 两个时钟都不需要Java代码,只要在layout的xml里插入以下代码即可自动显示时间

<AnalogClock android:id="@+id/AC"
        android:layout_width="wrap_content" 
           android:layout_height="wrap_content" 
/>
<DigitalClock
    android:id="@+id/DC"
    android:layout_width="wrap_content"
    android:layout_height="wrap_content"
/>